Clinically proven where moderate to heavy exudate was present, the canister system, with variable pressure settings, was preferred.
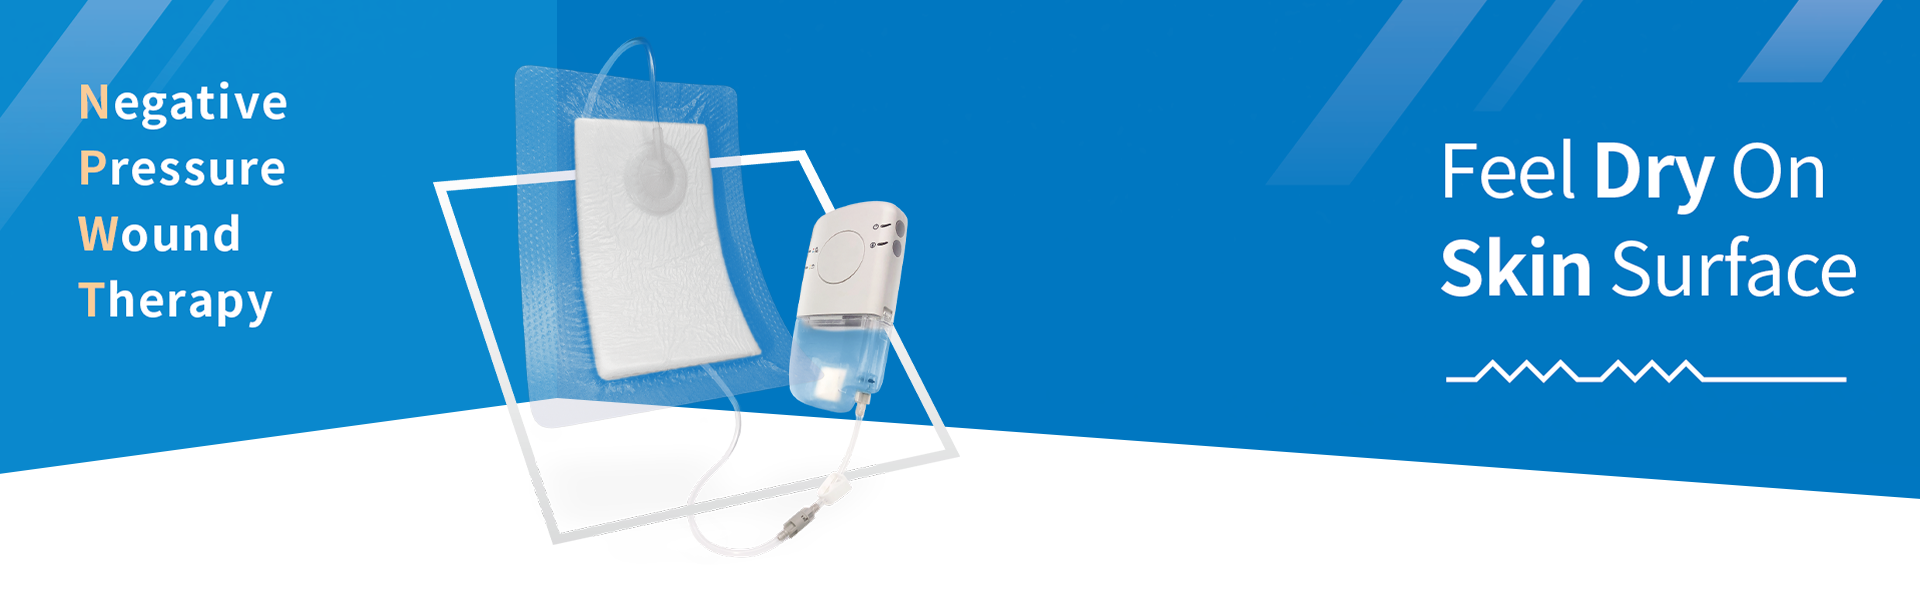
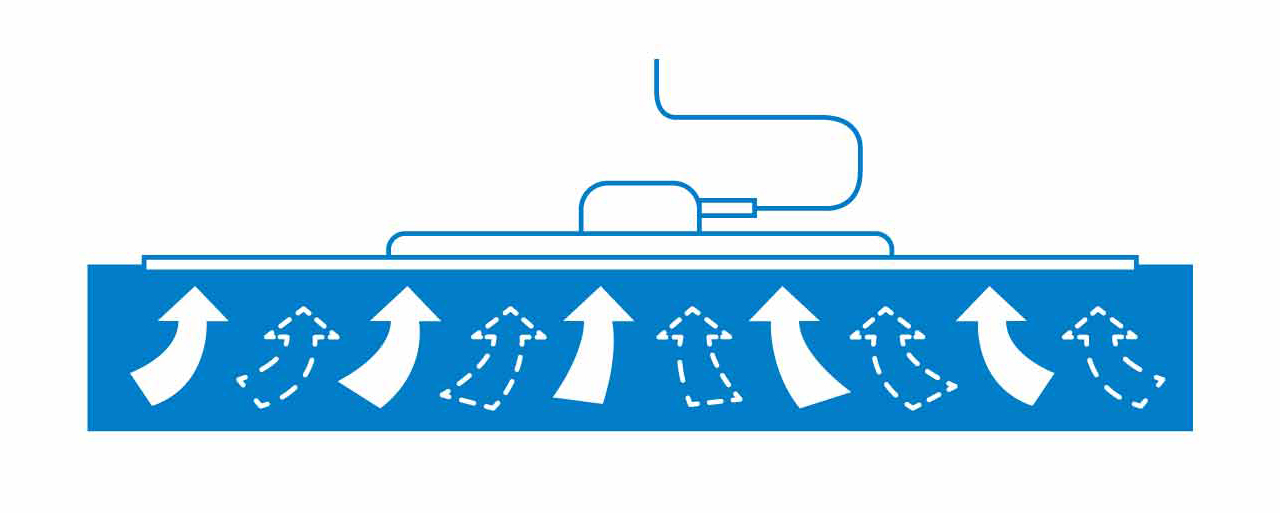
Disposable INPWT can be used to remove fluid from a wound site preventing fluid build-up, maceration and oedema.

Clinically proven where moderate to heavy exudate was present, the canister system, with variable pressure settings, was preferred.
Disposable INPWT can be used to remove fluid from a wound site preventing fluid build-up, maceration and oedema.
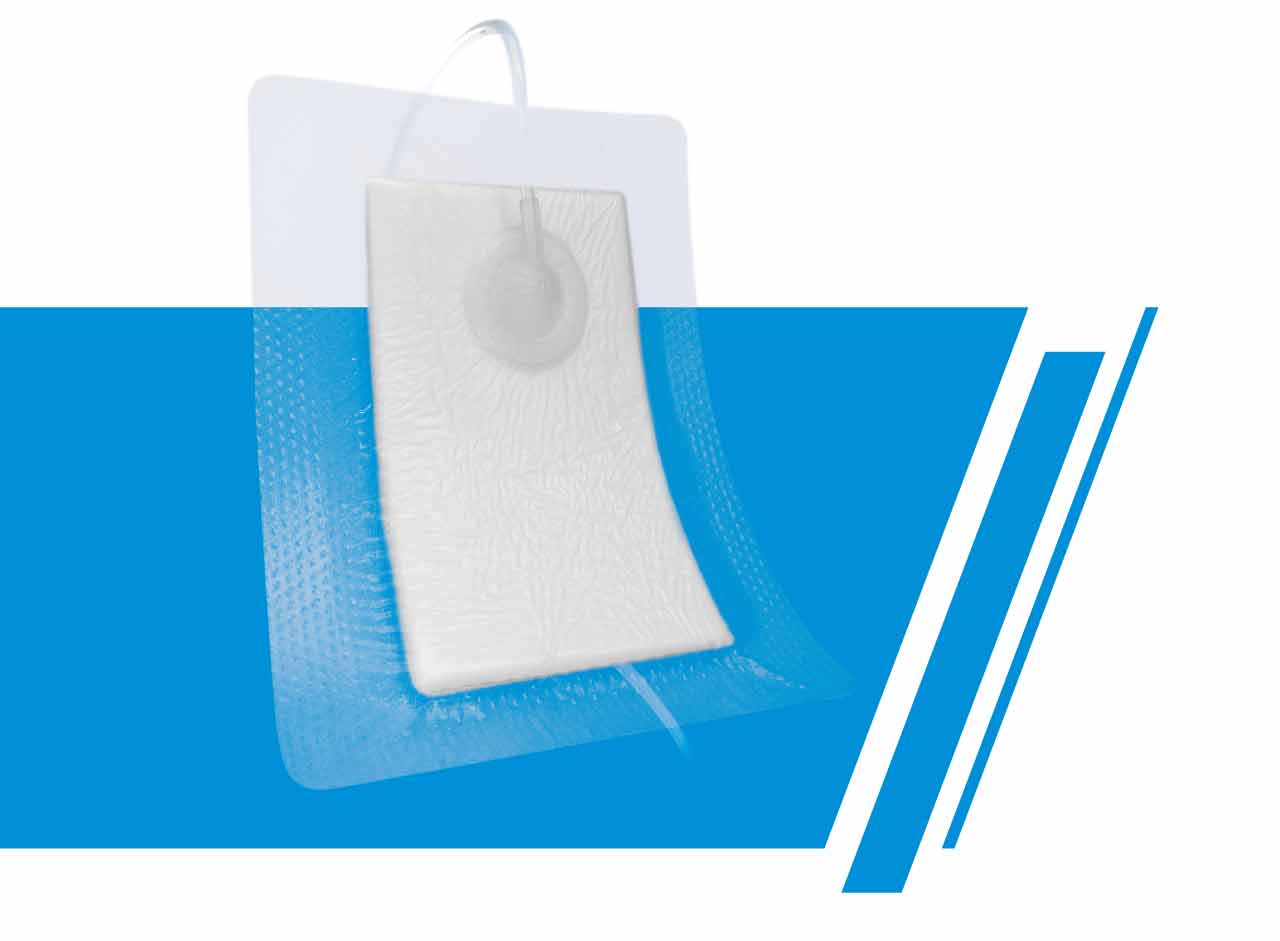
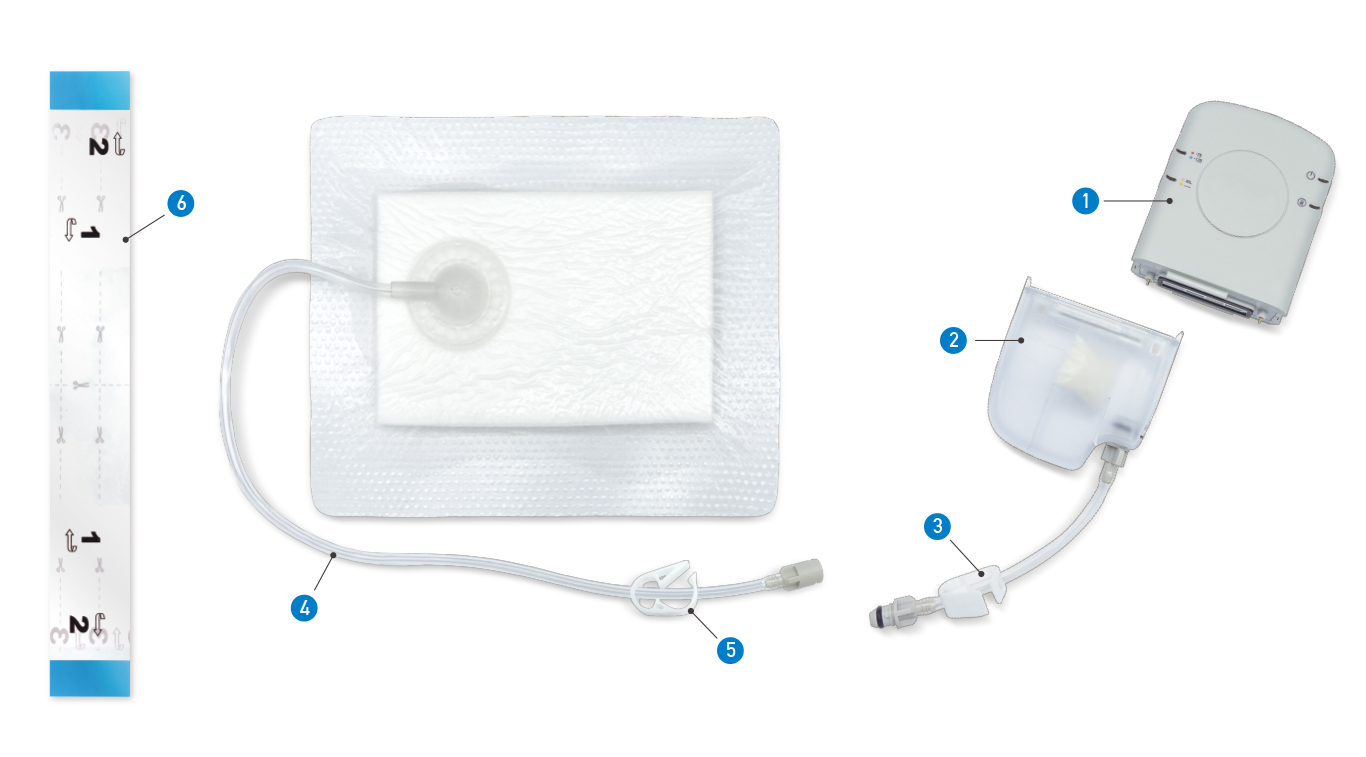
It is evident that it would be easier if a single-use NPWT unit is designed with a small, easy-to-change canister, thus allowing it to be changed without removing dressings frequently to avoid external contamination. Clinical results indicated a maximum fourfold increase in blood flow with a negative pressure of -125mmHg, which will facilitate the growth of granulation. Canister-based INPWT is easier to achieve a seal and, therefore, prevent soiling and contamination. A silicone interface is used as an adhesive at the dress
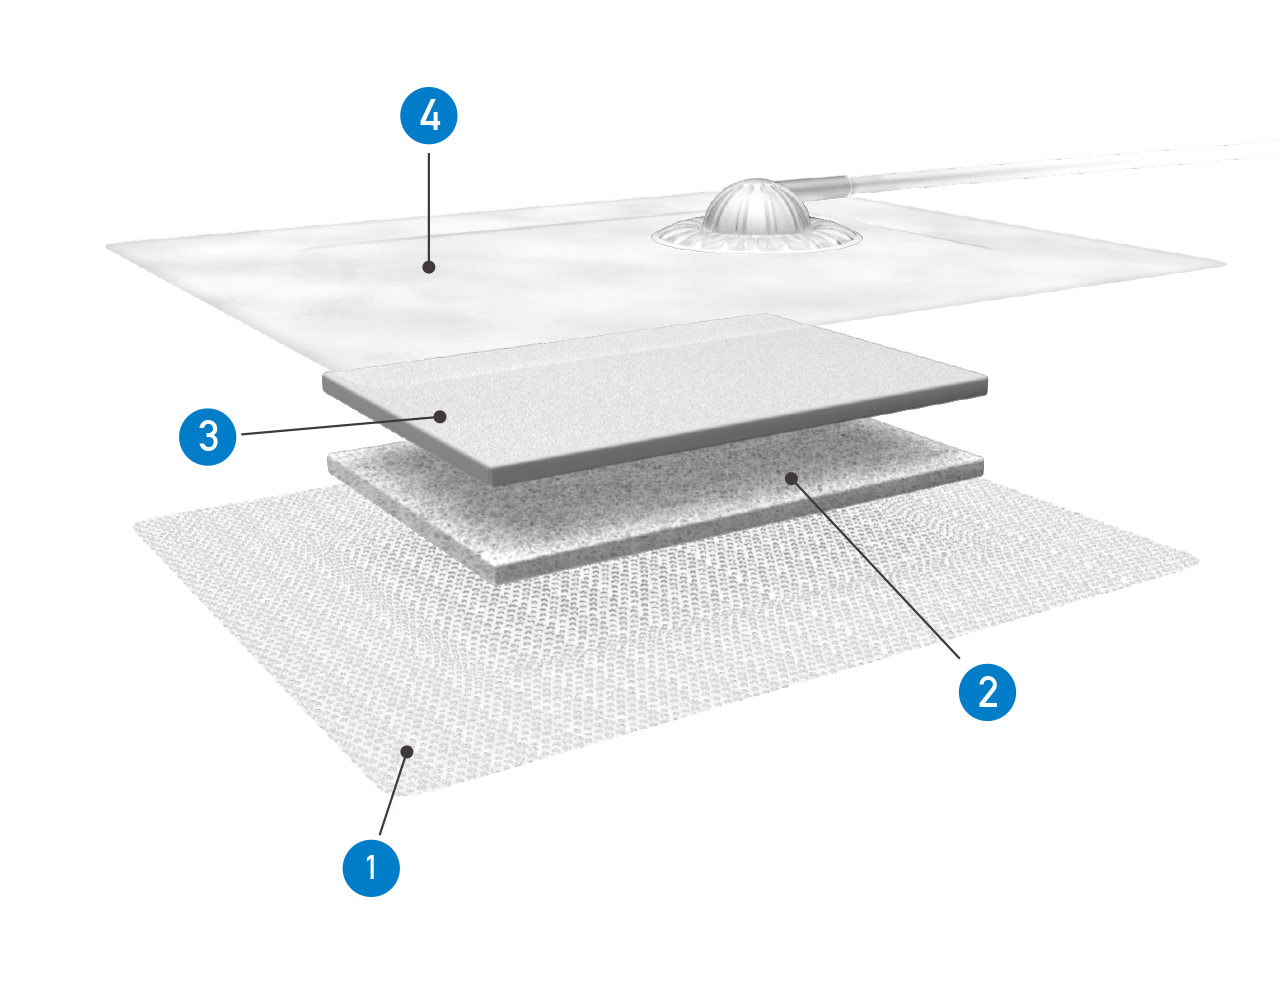
A silicone interface is used as an adhesive at the dressing base to protect fragile skin. Silicone dressing ensure the intact wound without pain while removing. As per clinical studies silicone dressing is unsuitable without the option of a canister due to the heavy exudate.
The continuous mode is recommended over unstable structures, such as an unstable chest wall or non-intact fascia, in order to help minimize movement and stabilize the wound bed. Continuous therapy is also generally recommended for patients at increased risk of bleeding, highly exudating wounds, fresh flaps and grafts, and wounds with acute enteric fistulae.
The variable mode with a pressure range between -30mmHg ~ -80mmHg and/or -30mmHg ~ -125mmHg, which is set to alternate every 3 minutes. Variable pressure has been recognized to reduce pain, compared to a traditional intermittent setting. Variable settings can promote more robust granulation tissue and better wound/scar appearance.
1.Clean and prepare wound according to wound care clinical guidelines.
2.Remove the release liner from the back of the dressing
3.Apply the dressing evenly to the wound, and take care in smoothing out creases or wrinkles on the dressing border
1.Connect the dressing tubing to the canister tubing
2.Check to ensure the two clips are not clamped
3.Insert the batteries into the device and press the POWER button holding for 3 seconds, you will hear the pump activate and perform an automatic self-check for a short period
4.There are two LED lights flashes next to PRESSURE & THERAPY button during these self-check period
1.Once negative pressure setting is established, the blue LED light next to STANDBY button will flash once every second indicating the system is working well
2.You will also see the dressing compressed when negative pressure delivered.
3.Remove the release liners step by step before you apply the fixation strips all around the dressing border to ensure you have a good seal
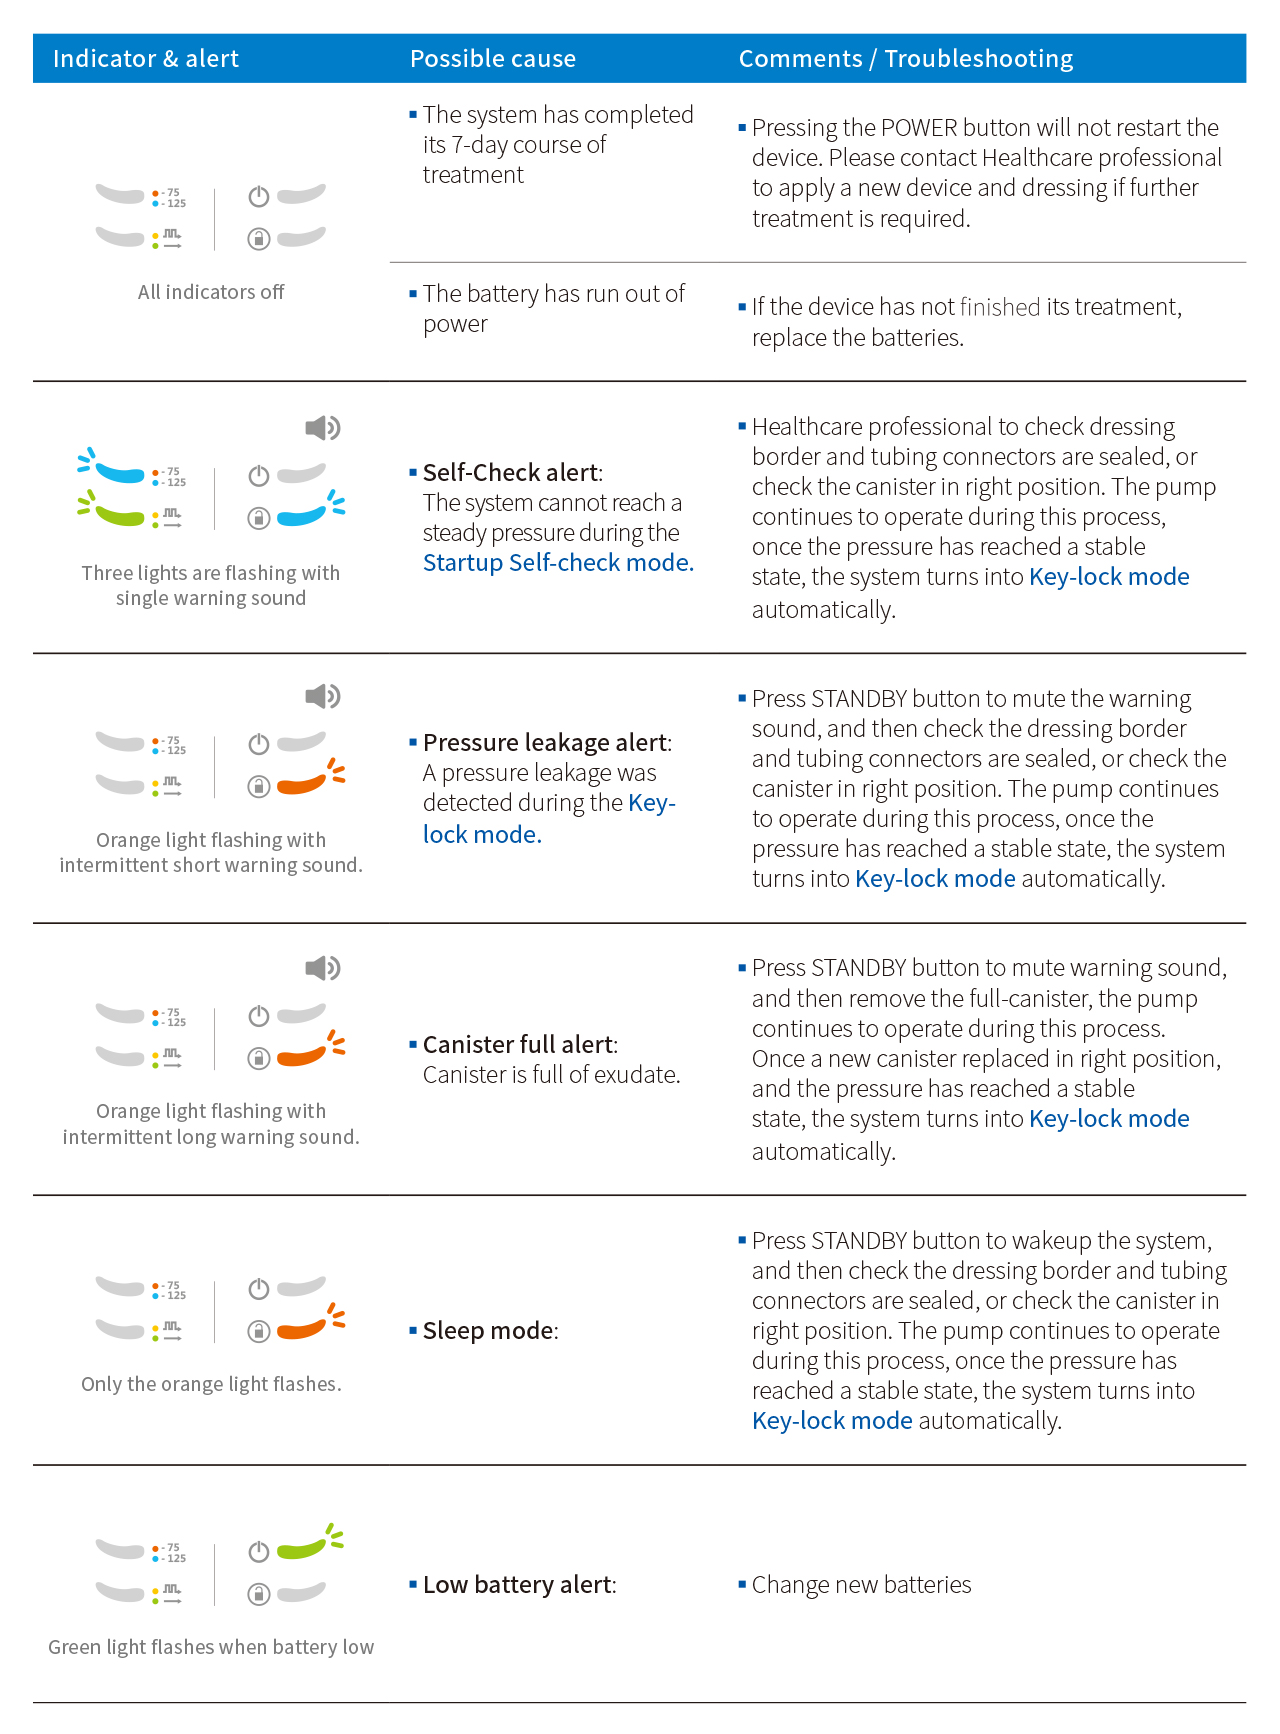
1.Canister full alert, press STANDBY button to mute the warning sound, make sure both clips are clamped before disconnecting the tubing connectors.
2.Removing the full-canister, the pump continues to operate during this process.
3.Replace a new canister and release two clips on tubing, the system will restart the Self-check mode automatically.